Gallery Stack 3 - Easy CMS Tutorial
This tutorial was created by Rob Beattie. Thank you!
Creating an Instagram-style gallery that clients can update using Gallery 3 and EasyCMS
(note: this probably works with TotalCMS as well but I haven't tested it).
You will need:
- A recent version of Rapidweaver
- Gallery 3 from Instacks
- EasyCMS from Weaverspace
- In addition, Total CMS free download installed in Rapidweaver (but not used actively in the project)
- The Stacks plugin
- Four JPG images (they can be different shapes and sizes)
- Somewhere to publish your site - a hosting account
1. Create an empty project, add an empty Stacks page and pick a theme. In this example we're using the Engineer theme that's included with Rapidweaver.

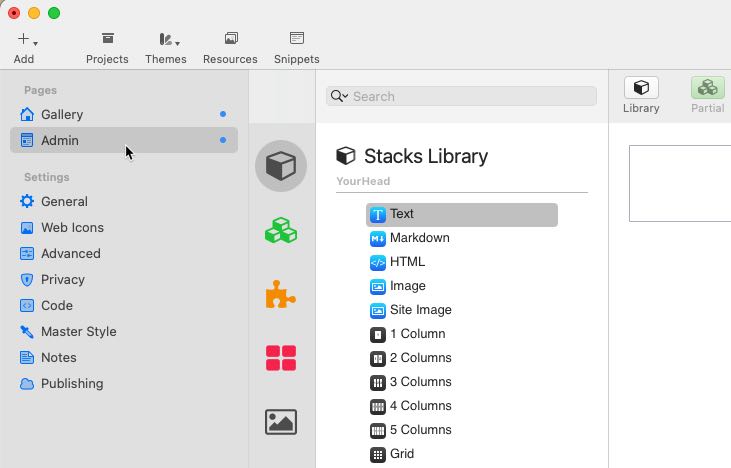
2. Add a second Stacks page and then name the first page 'Gallery' (this will be your home page) and name the second page 'Admin'.
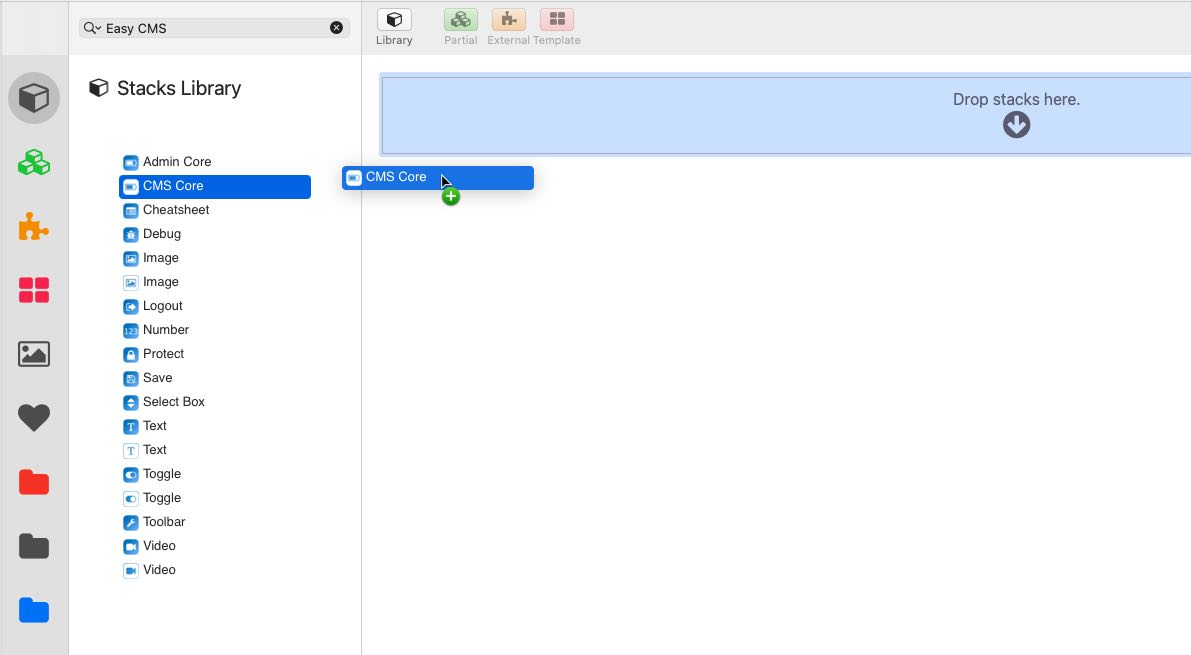
3. First, let's set up the CMS. Switch to the Gallery page and then search for Easy CMS in your Stacks library. Then drag the CMS Core stack into the empty page.
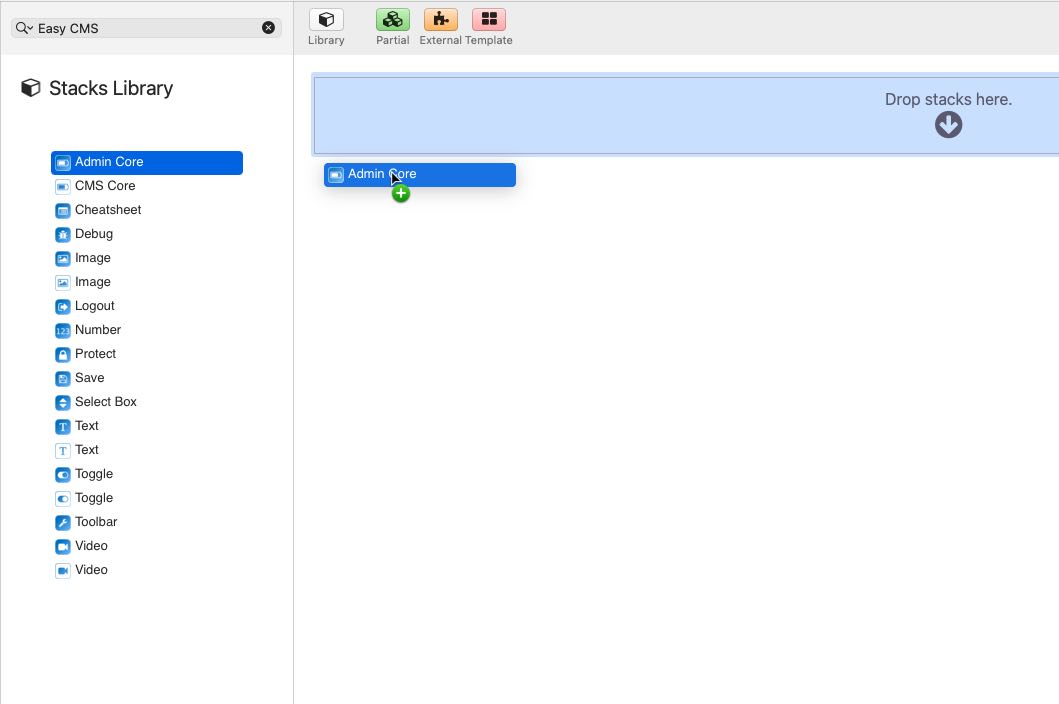
4. Next, switch to the Admin page and drag the Admin Core stack onto the empty page.
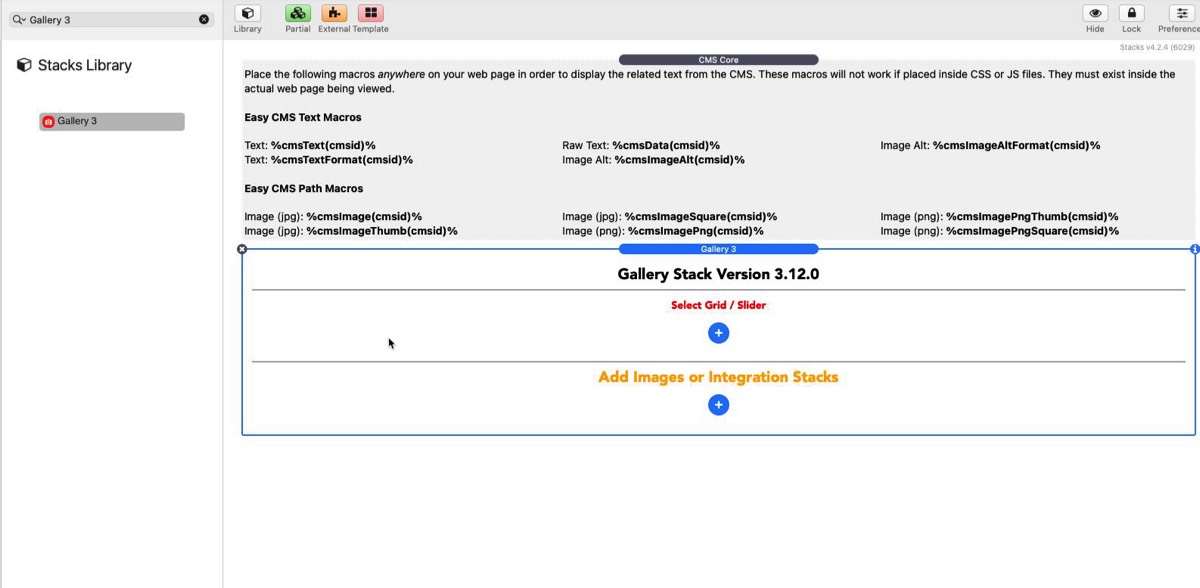
5. Now let's create the gallery. Switch back to the Gallery page and search for Gallery 3 in your Stacks library. Then drag the stack out onto the page.
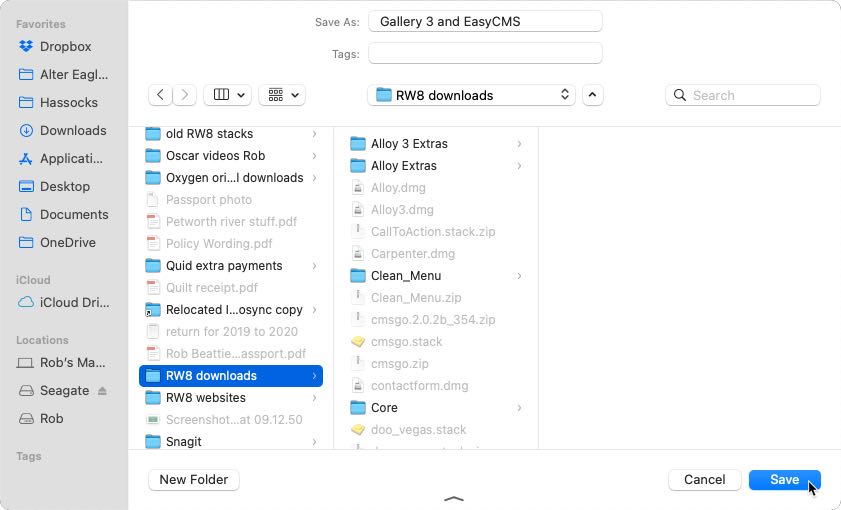
6. Now's a good time to save your project.
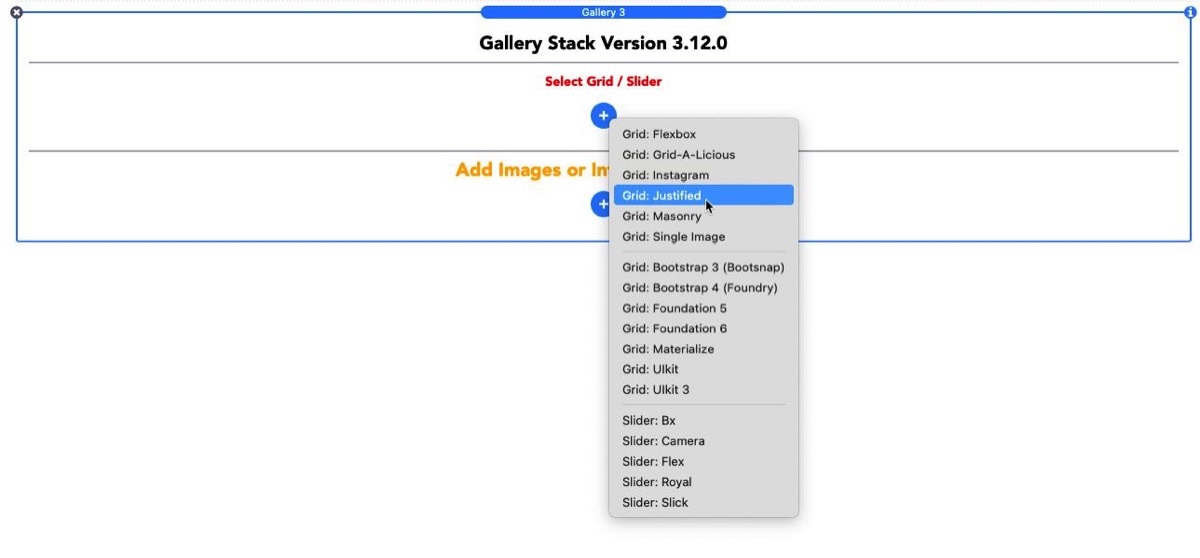
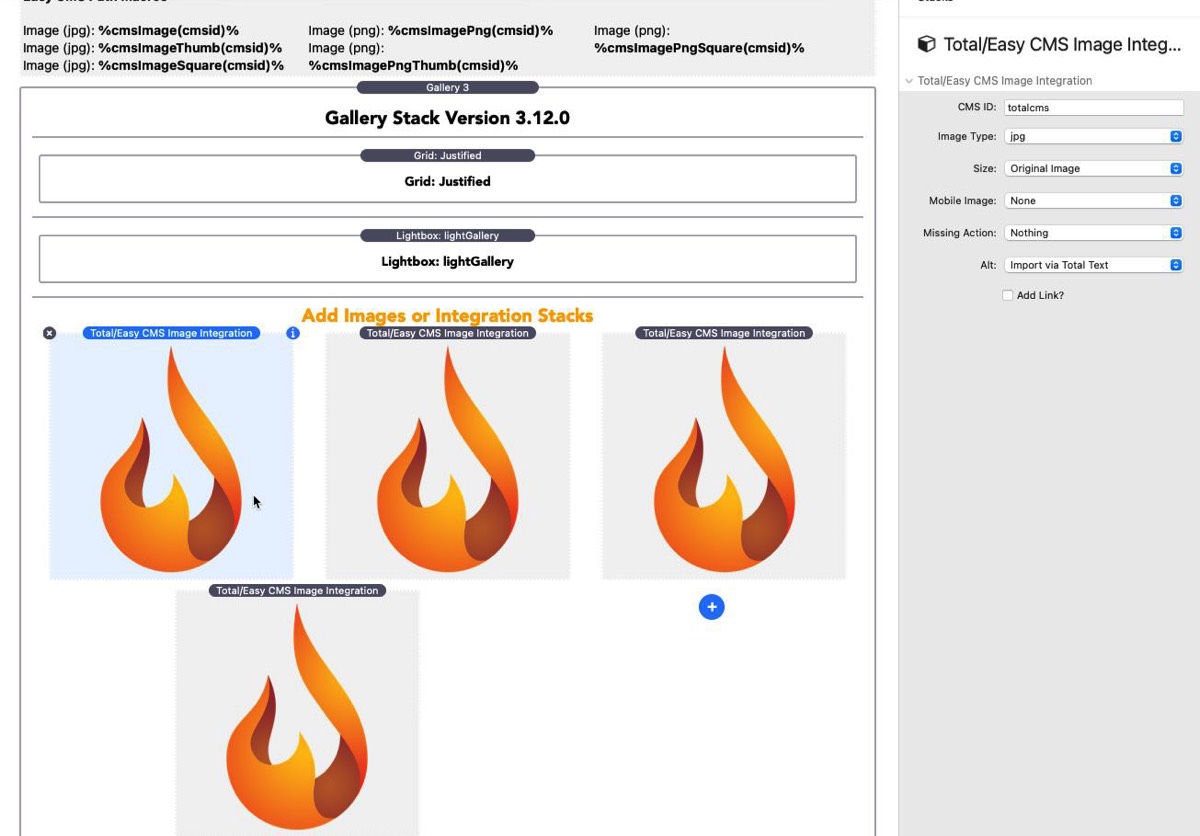
7. To set up a grid for your images, click the blue '+' button in the 'Select Grid/Slider' panel and choose Grid: Justified from the menu.
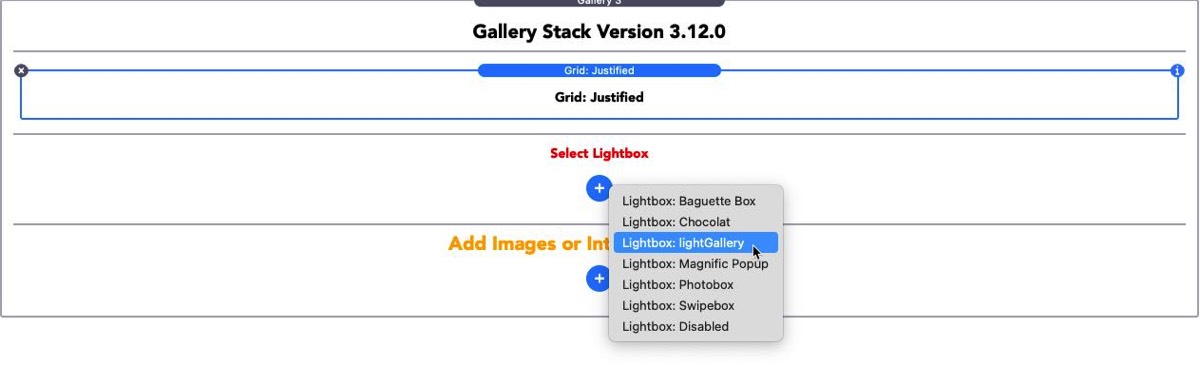
8. Then select the lightbox from the panel underneath in the same way. We know that 'lightGallery' supports captions, so we've chosen that.
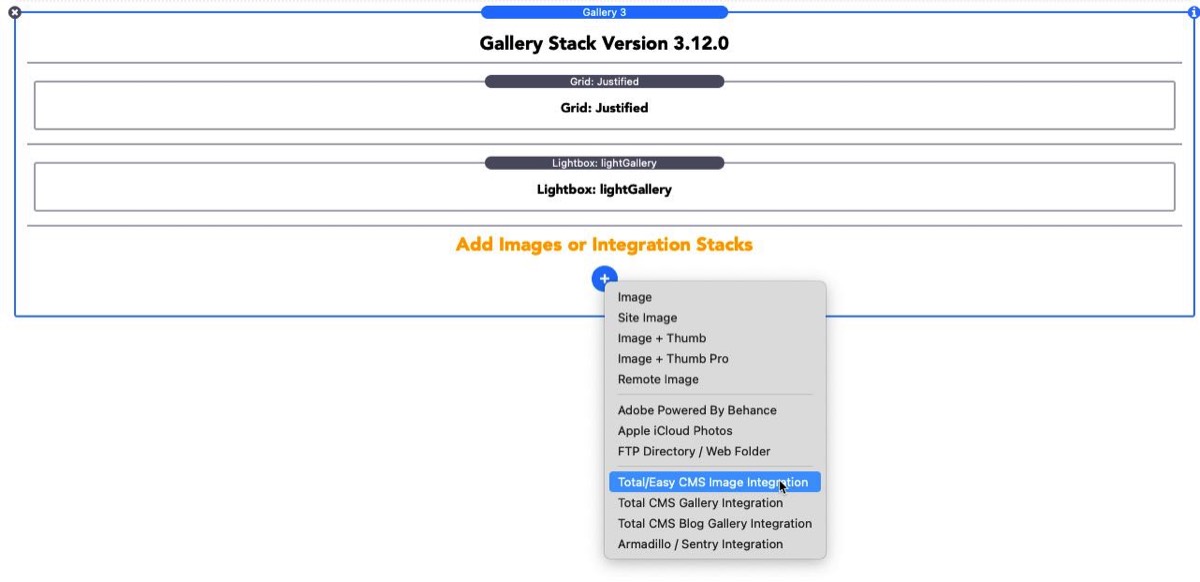
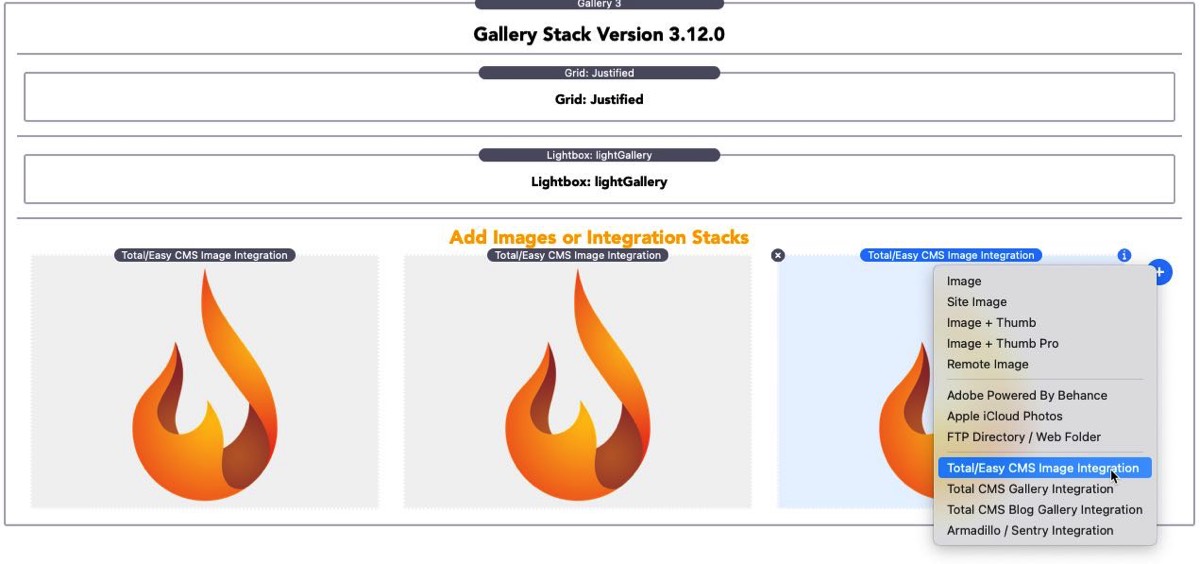
9. Next, move to the 'Add Images or Integration Stacks' panel, open the button and select Total/Easy CMS Image Integration. Note: This child stack comes with the (free) Total CMS package, which have to be installed in Rapidweaver, but not used actively inside the project.
10. That will add a slot for the first image in the gallery, like so.

11. Click the blue '+' button next to add a second image slot and then add two more to make a gallery of four images.
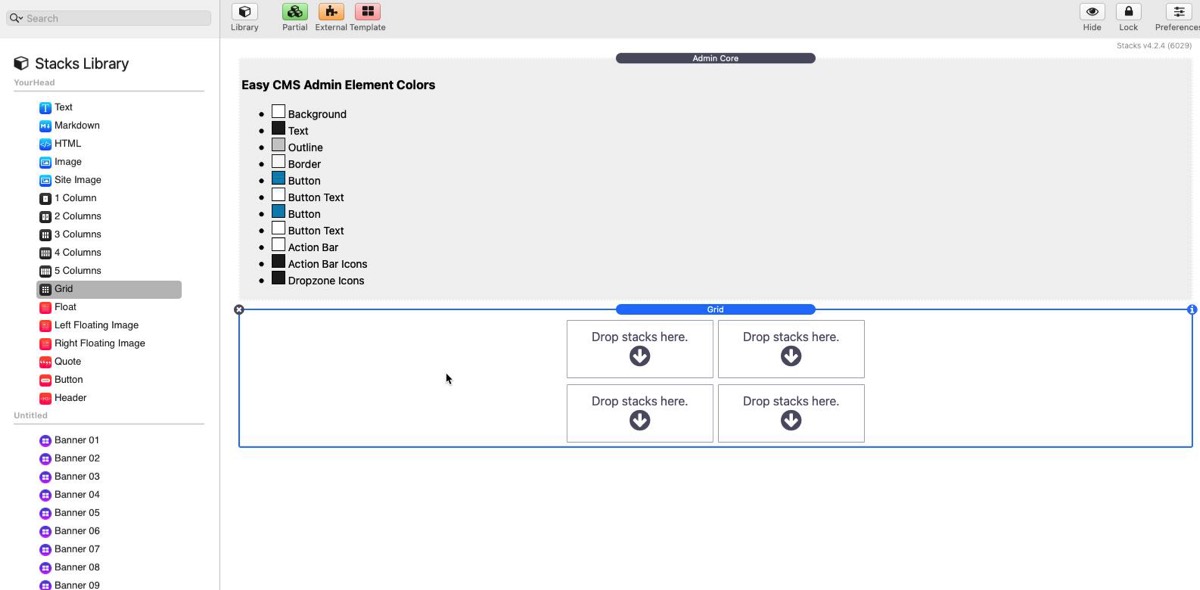
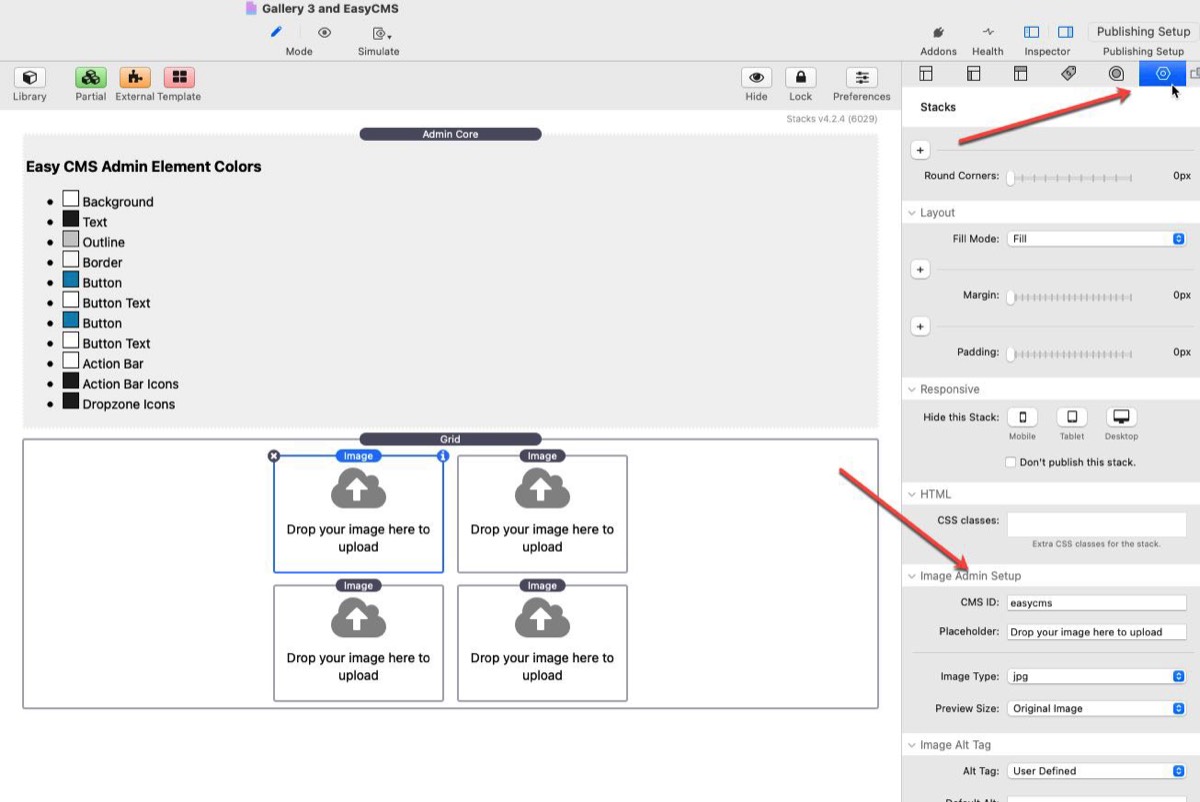
12. Save your project and then switch to the Admin page. Add a standard Stacks Grid stack to the page.
13. Find your Easy CMS stacks in the Stacks library and add an Image Stack (IMPORTANT: make sure you use the first of the two image stacks in your Easy CMS library as this one is designed to be used in the Admin section. If you select the other one, it WILL NOT WORK).
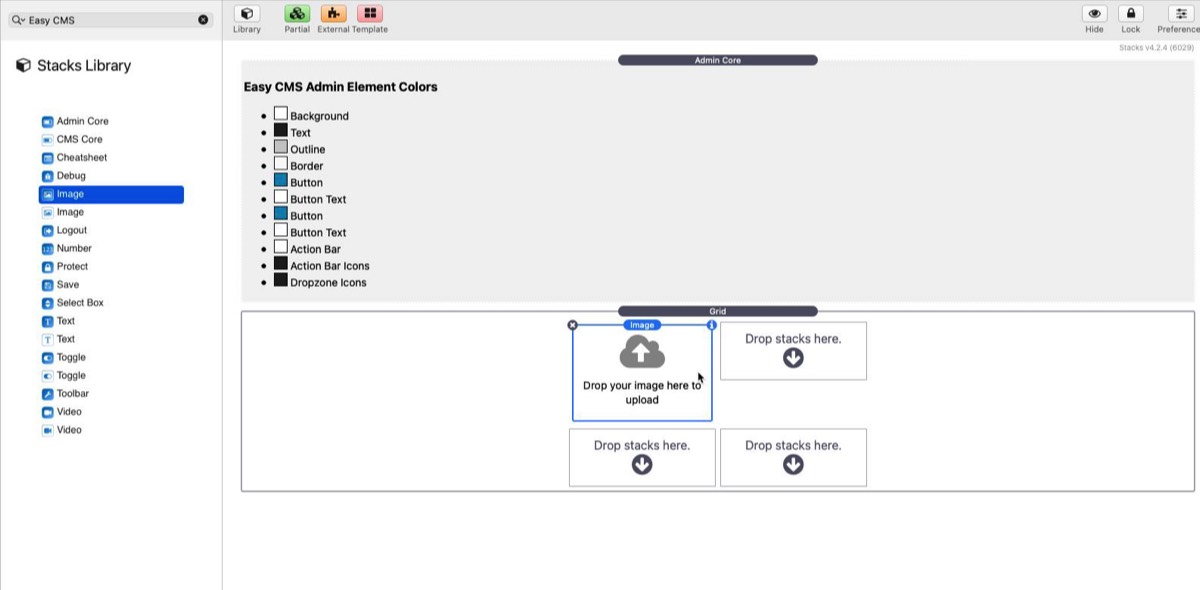
14. Drag another three image stacks out onto the page so it looks like this.
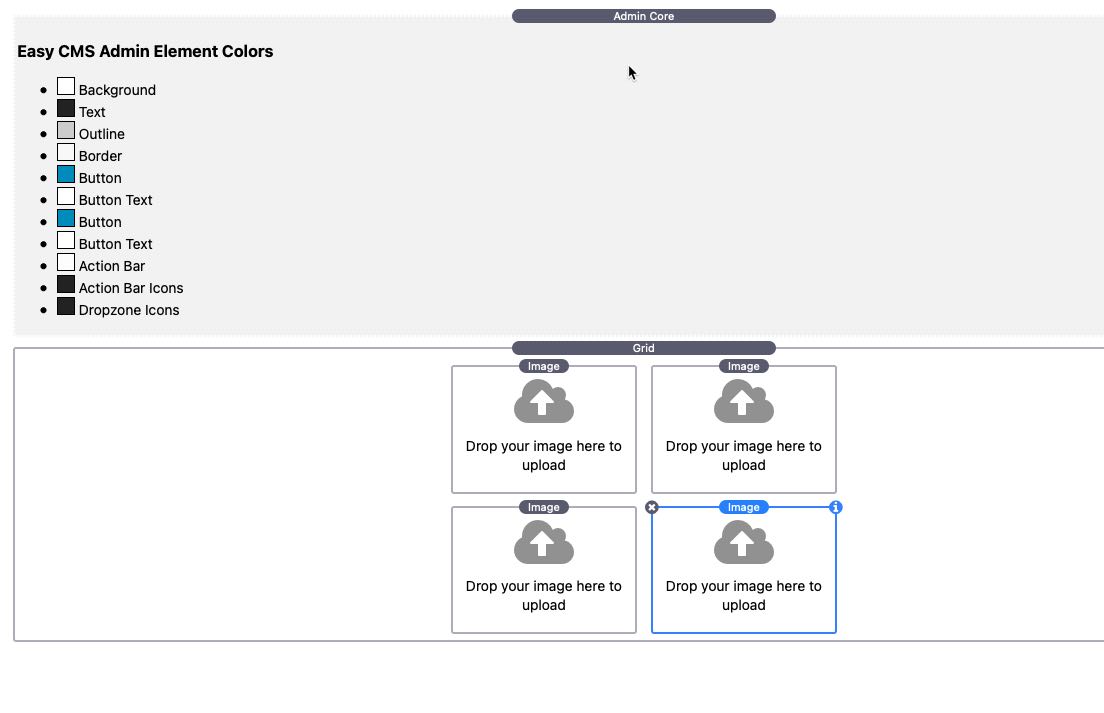
15. Select the first image in the grid and then open the Inspector so it appears on the right side of the screen.
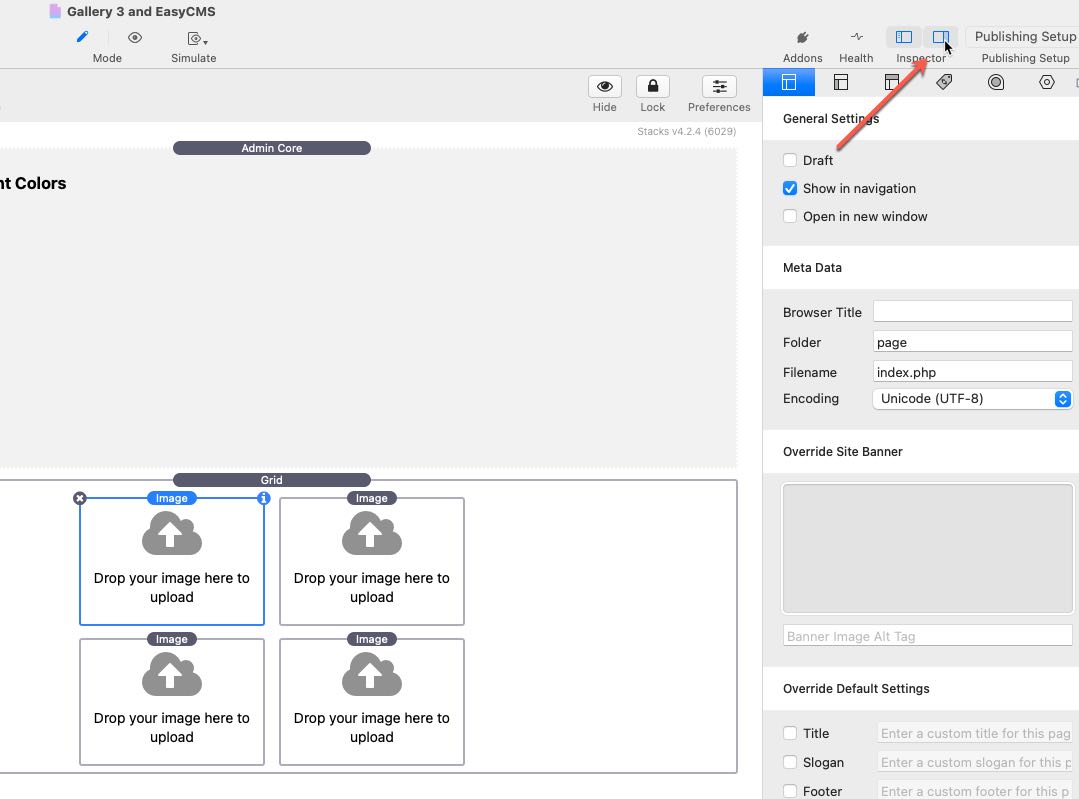
16. Next, click the Plugin Settings button at the top right of the Inspector and scroll down to the Image Admin Setup section.
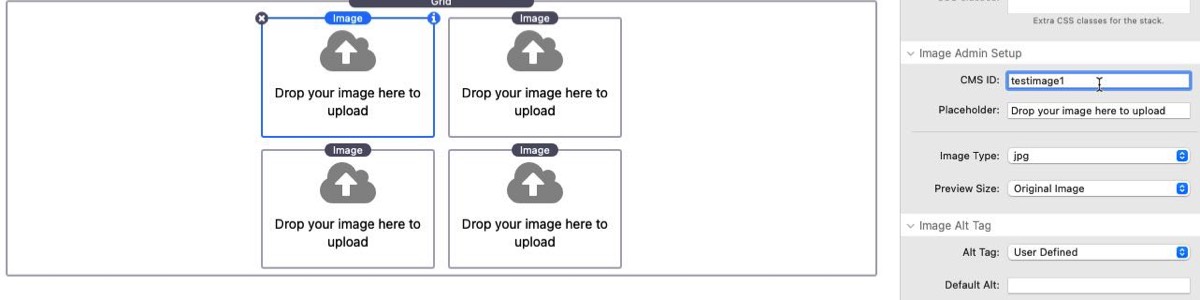
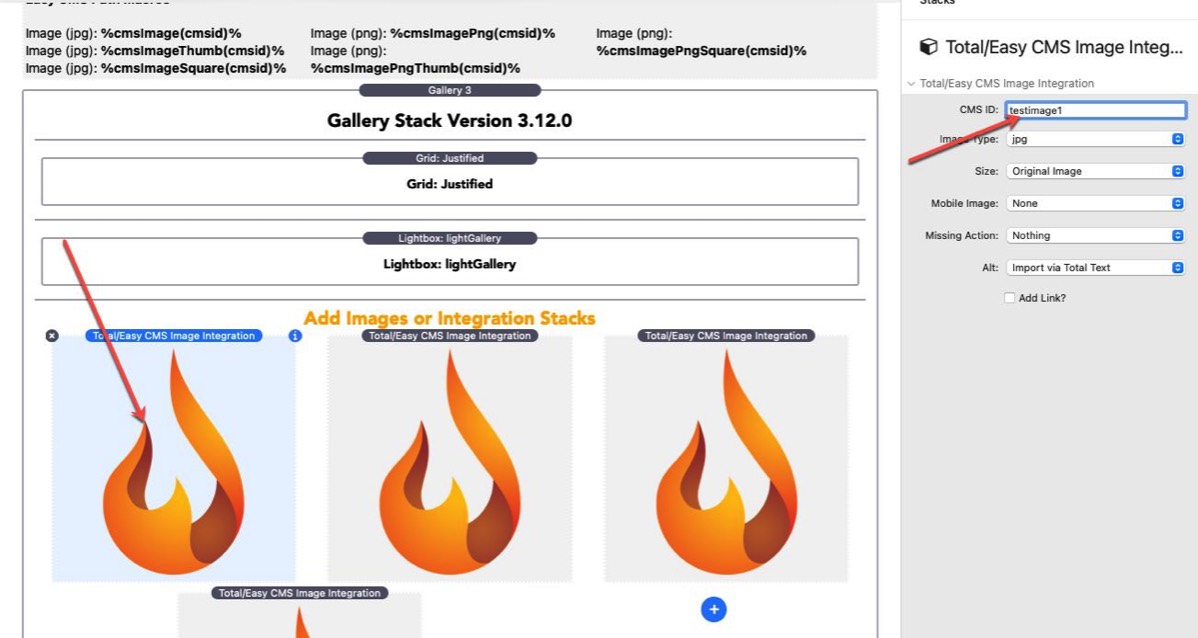
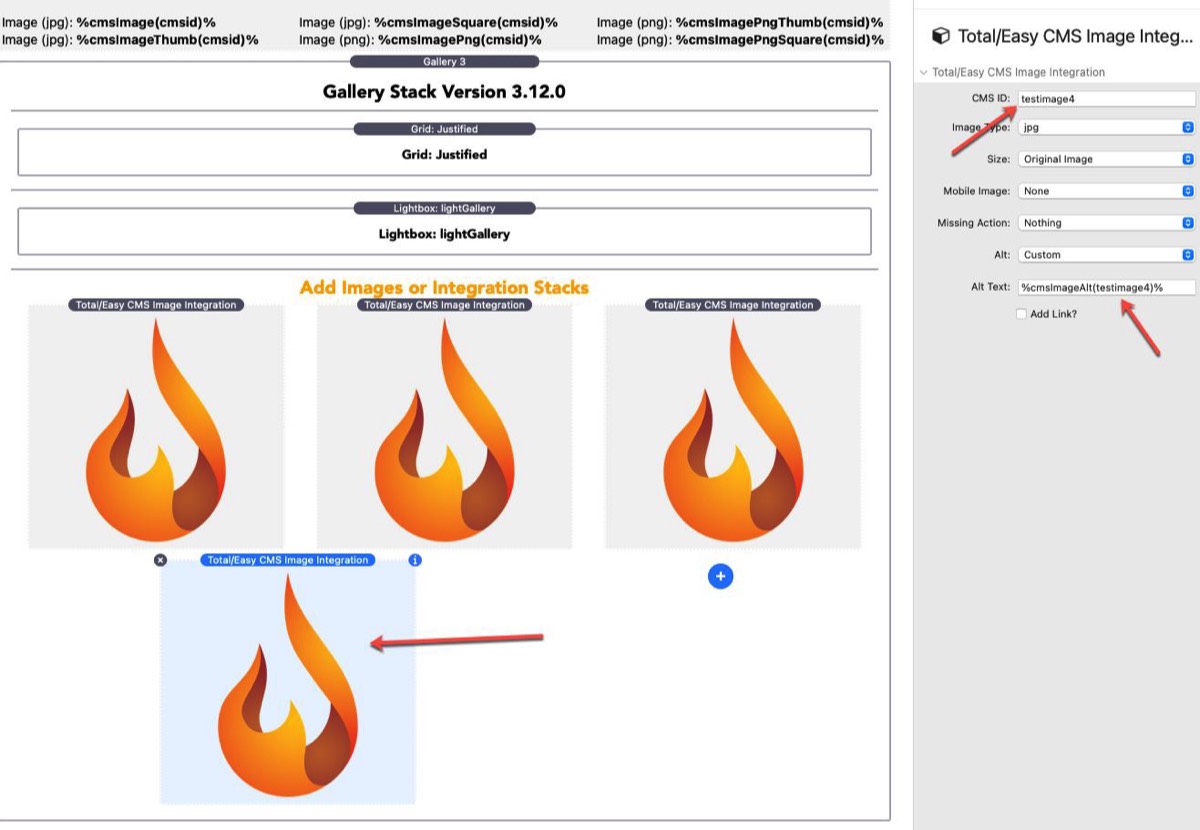
17. Select the first image in your grid by left clicking on it. We're now going to give our first image a unique ID, so that the Gallery 3 stack knows which image to display in the grid on the Gallery page. In this example the ID is 'testimage1' (don't use quote marks).
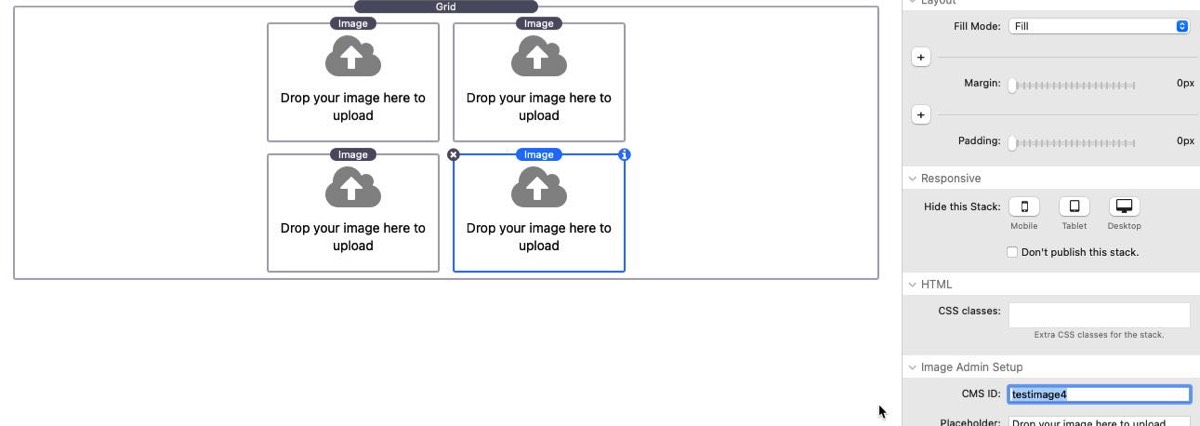
18. Leave the other settings as they are and select the second image. Give that a unique ID of 'testimage2'.

19. Give the remaining two images unqiue IDs in the same way and then save your project.
20. Switch back to the Gallery page and select the first image. Make sure that Plugin Settings is selected in the right hand Inspector panel so you can see the options shown here.
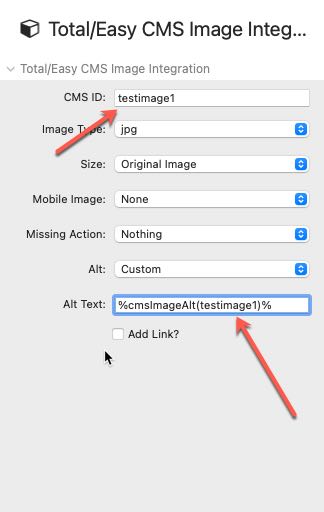
21. Make sure the first image is selected and then give it the same unique ID as the first image on the Admin page - in this example it's 'testimage1' (again, don't use quote marks). This will create a link between the Admin image and the image that's displayed in the gallery.
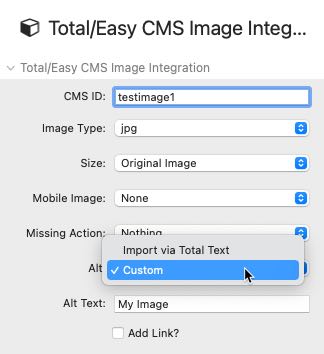
22. Next, open the Alt drop down menu and choose Custom.
23. When you do that a new field appears - 'Alt Text' and it's here you can add a little bit of code (called a macro) which will allow your client to add a caption to the image. The bit in the brackets should be the same as the unique ID you created for this image - so our code looks like this: %cmsImageAlt(testimage1)%
24. Repeat steps 21 - 23 with the remaining three images. Remember that each Admin image has a unique ID and so each image in the actual gallery must have the same ID and each Alt Text field have the same ID (for example, the second image is testimage2 and the Alt Text code is therefore %cmsImageAlt(testimage2)% and the third image is testimage3...and so on.)
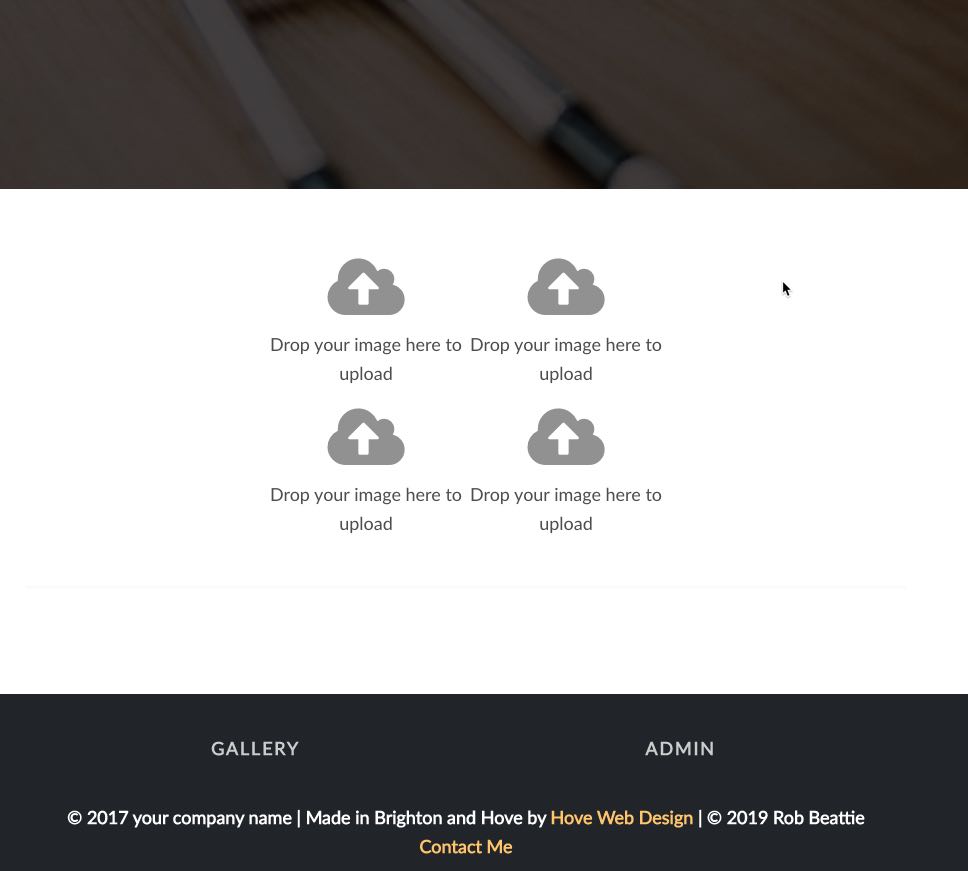
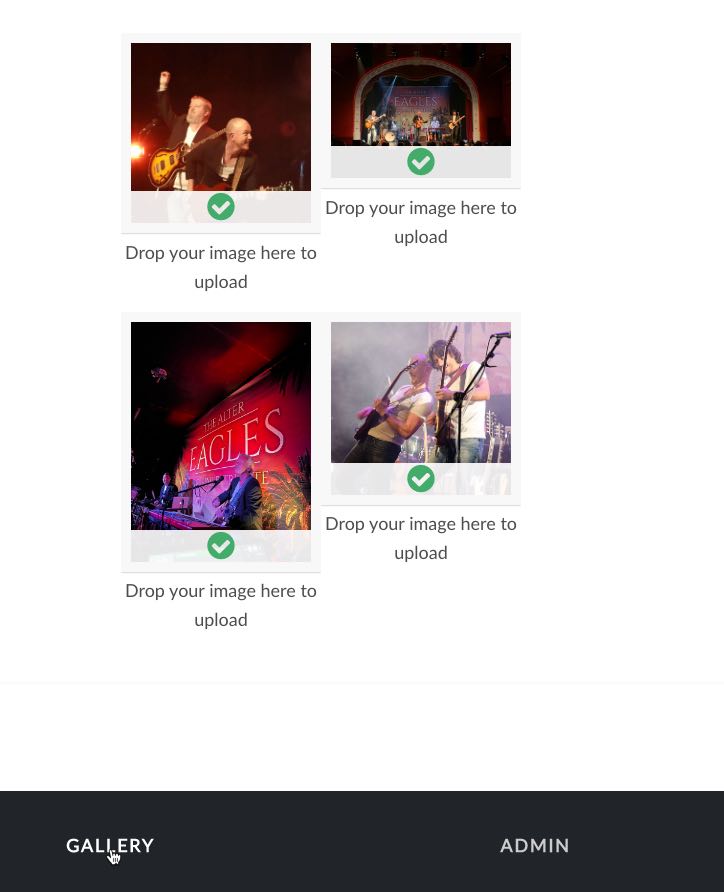
25. Next, save your project and publish your website. Then navigate to the site and open the Admin page. (Normally this would be password-protected of course but we've skipped that step for simplicity's sake). Here you can see the four image 'wells' on the Admin page where you or your client can upload images.
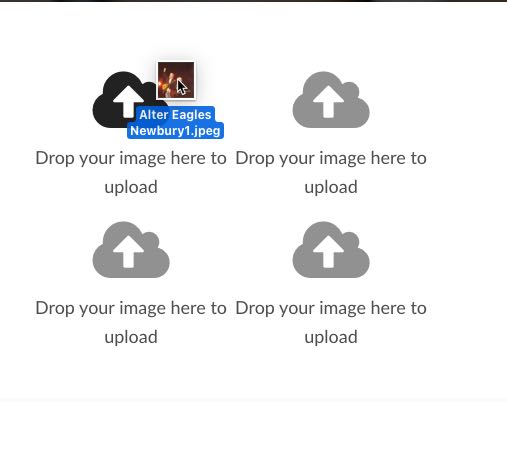
26. You can either drag an image over the first upload icon (it'll change colour as you do) and release to start the upload, or you can click the upload icon and then use your Mac's file commands to navigate to where the image is stored. Up to you.
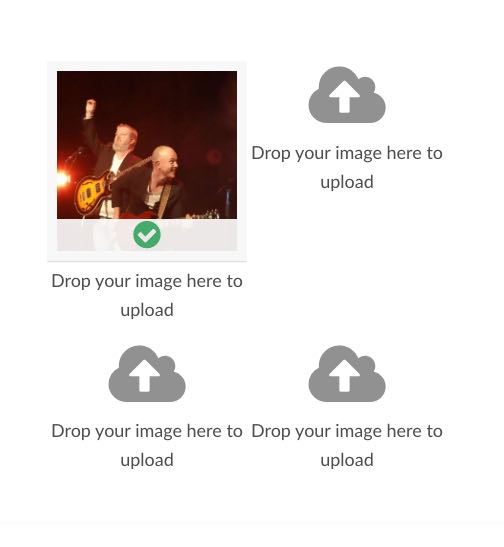
27. Once the image has been uploaded, you'll see a green tick beneath it.
28. Repeat the process for the remaining four images and then click the Gallery menu item to navigate to the Gallery page.
29. You should see something like this. Four images arranged in a grid. You can click each one and open it in a lightbox and it looks pretty good, but there are a couple of things we can do to improve it - including adding captions.

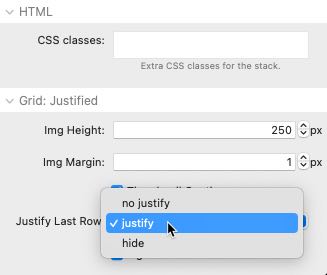
30. Flip back to Rapidweaver and make sure you're on the Gallery page. Select the Grid: Justified panel and then scroll down the Inspector panel on the right and open the drop down menu next to 'Justify Last Row' and select justify.
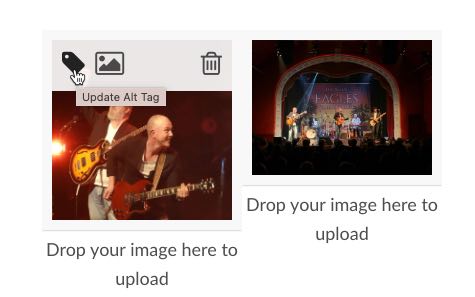
31. Save your change by publishing the page again. Then go back to the site and switch to the Admin page. Hover over the first image and click the tag icon.
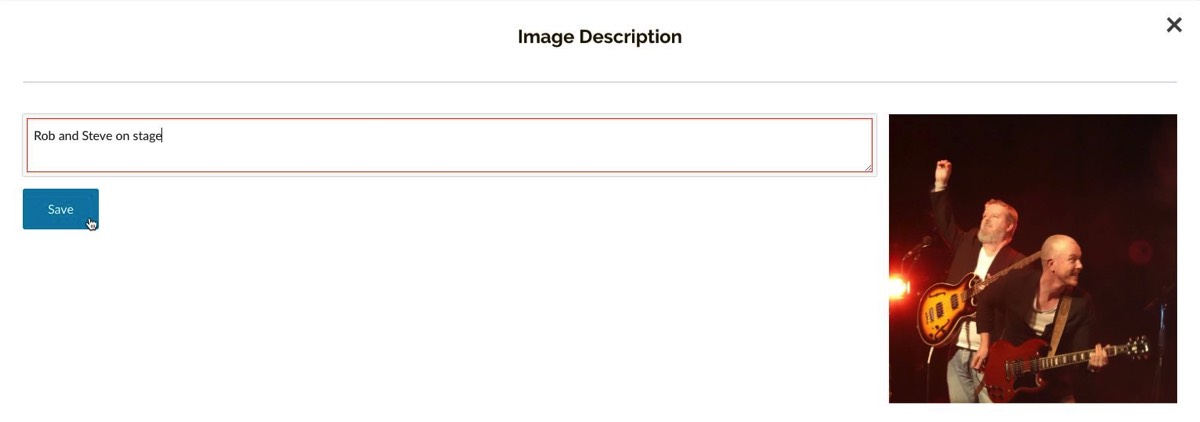
32. You can now type in a caption for the image and then click the Save button.
33. Flip back to the Gallery page on your website and refresh the page, then hover the mouse pinter over the first image and you'll see the caption appear. Notice too that the last row of the image grid is now justified.

34. You can add captions to the remaining images in the same way, edit existing captions as well as deleting images and captions and uploading new ones. With the lightbox we chose in Step 8, captions are displayed in the lightbox as well.
There are lots of other options in Gallery 3 we haven't explored here - different lightboxes and grid arrangements, borders, gutters and all sorts of other stuff. However, we hope this step by step will be enough to get you started on creating an image gallery that anyone can update without having to use Rapidweaver.