First Steps and Basic Configuration
Poster Stack is a powerful tool for blogging and many other use cases.
Here are just some of them:
- Write posts and articles
- Create product descriptions for a shop
- Display a gallery of galleries
- Document features of a new stack :-)
- ...
All use cases follow the principle of
- Combine multiple items like posts, products, galleries, or other objects on one page inside a list with a summary or overview
- Sort the list of items by date, title, index, or randomly
- Enable a pagination, so that the list of items is broken down on several pages, which can be navigated
- Allow a categorisation and filtering with help of categories, tags, authors dates, and other attributes
- Display the details of a item after selecting it from the list
Items can be created:
- Inside the Stacks Plugin of RapidWeaver with an own Poster item child stack (stacks based)
- With help of the markdown folder integration, each markdown file is a item
- With the upcoming online editor
Let me cite Wikipedia for this:
A blog (a truncation of "weblog") is a discussion or informational website published on the World Wide Web consisting of discrete, often informal diary-style text entries (posts). Posts are typically displayed in reverse chronological order, so that the most recent post appears first, at the top of the web page.
Source: Wikipedia
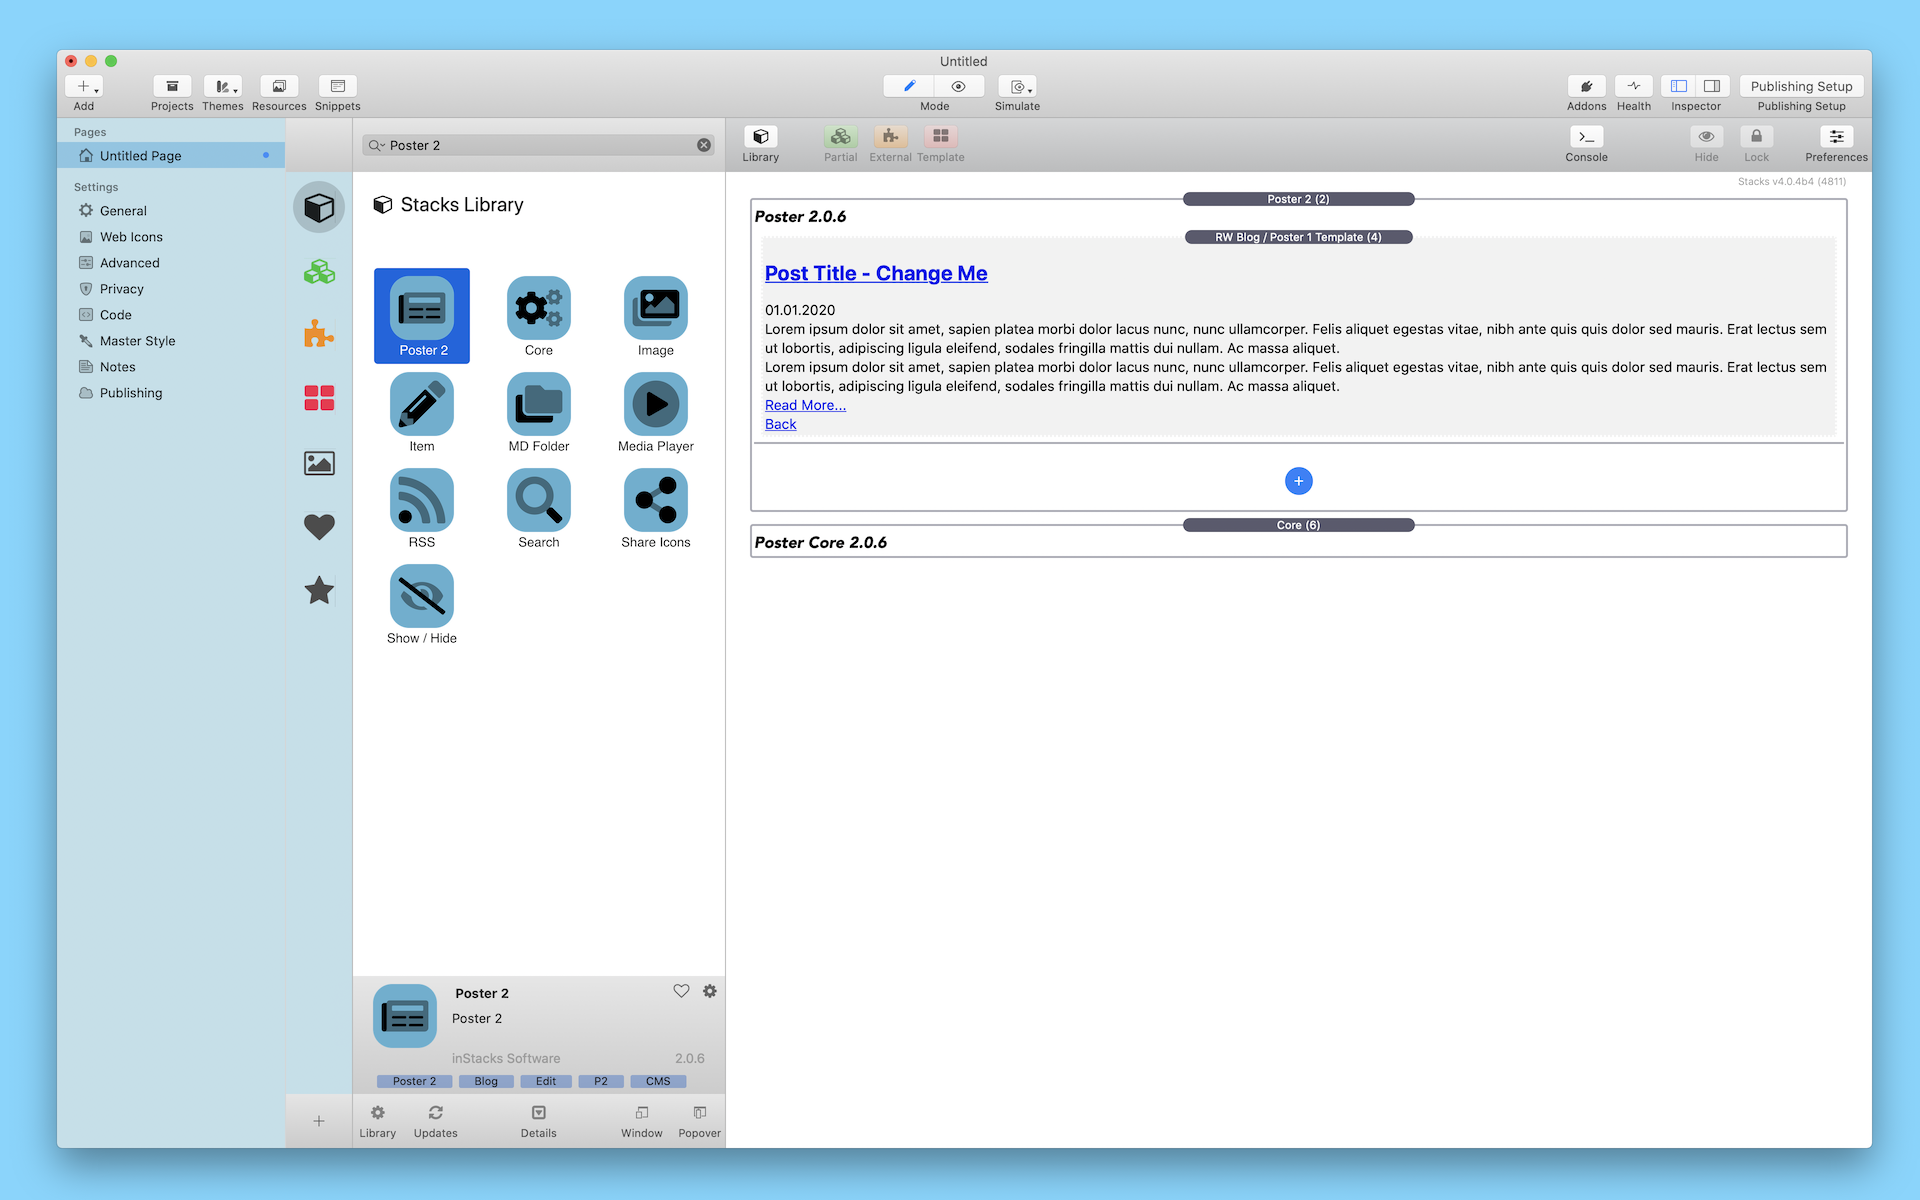
In order to start with Poster Stack, you create a Stacks plugin page inside RapidWeaver and add the Poster stack (aka main stack) to the page. This will act as kind of frame where you are able to define the used rendering template, add items, and change global settings. If not further explained, all settings have to be done in this main stack.
In addition, add the Poster Core stack to the page, which will take care of all the libraries used. You will find all Poster related stacks by searching in the Stacks plugin head-up-display for "Poster 2" or "P2".
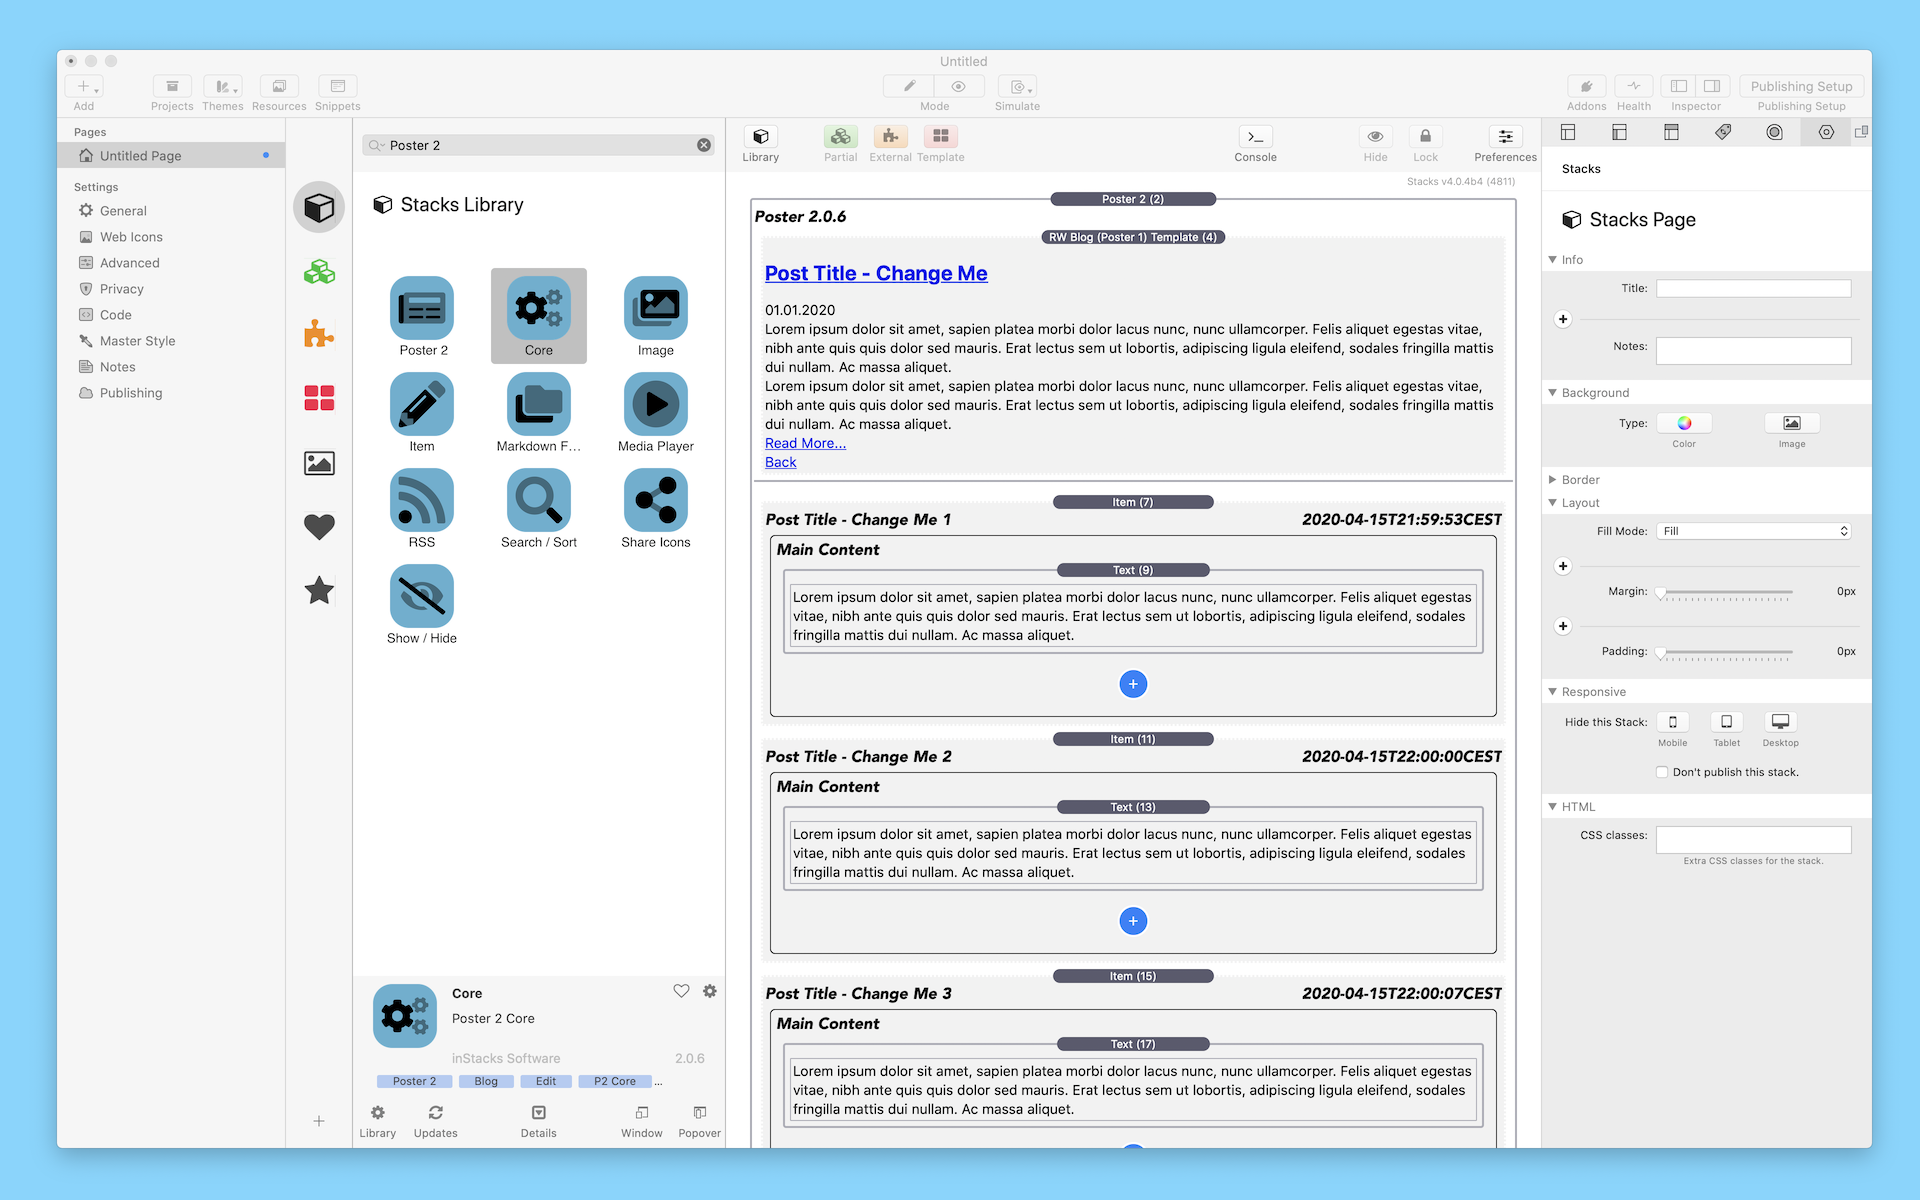
Poster stack is divided in 2 parts. The upper part contains the template which defines how the items are rendered. The lower part contains the items, either:
- Stacks based items defined directly on the page
- Markdown text files inside a folder
- In future with the online editor.
The markdown folder integration and online editor will be explained in a following topic.
A first item is added automatically. In order to create new items, either:
- Press the blue (+) button
- Select the item from the library and add it to the items area
- Copy and paste (cmd-c / cmd-v) existing items, and afterwards changing the copied one
It is no longer necessary to order the items manually, you are able to define a sorting algorithm in the Poster stack.
Give each item an own distinct name (or optionally, a distinct/unique slug). The title or slug defines the URL and permanent link, which the item is available under. Without a distinct title or slug, the detail view of the item will not display correctly.
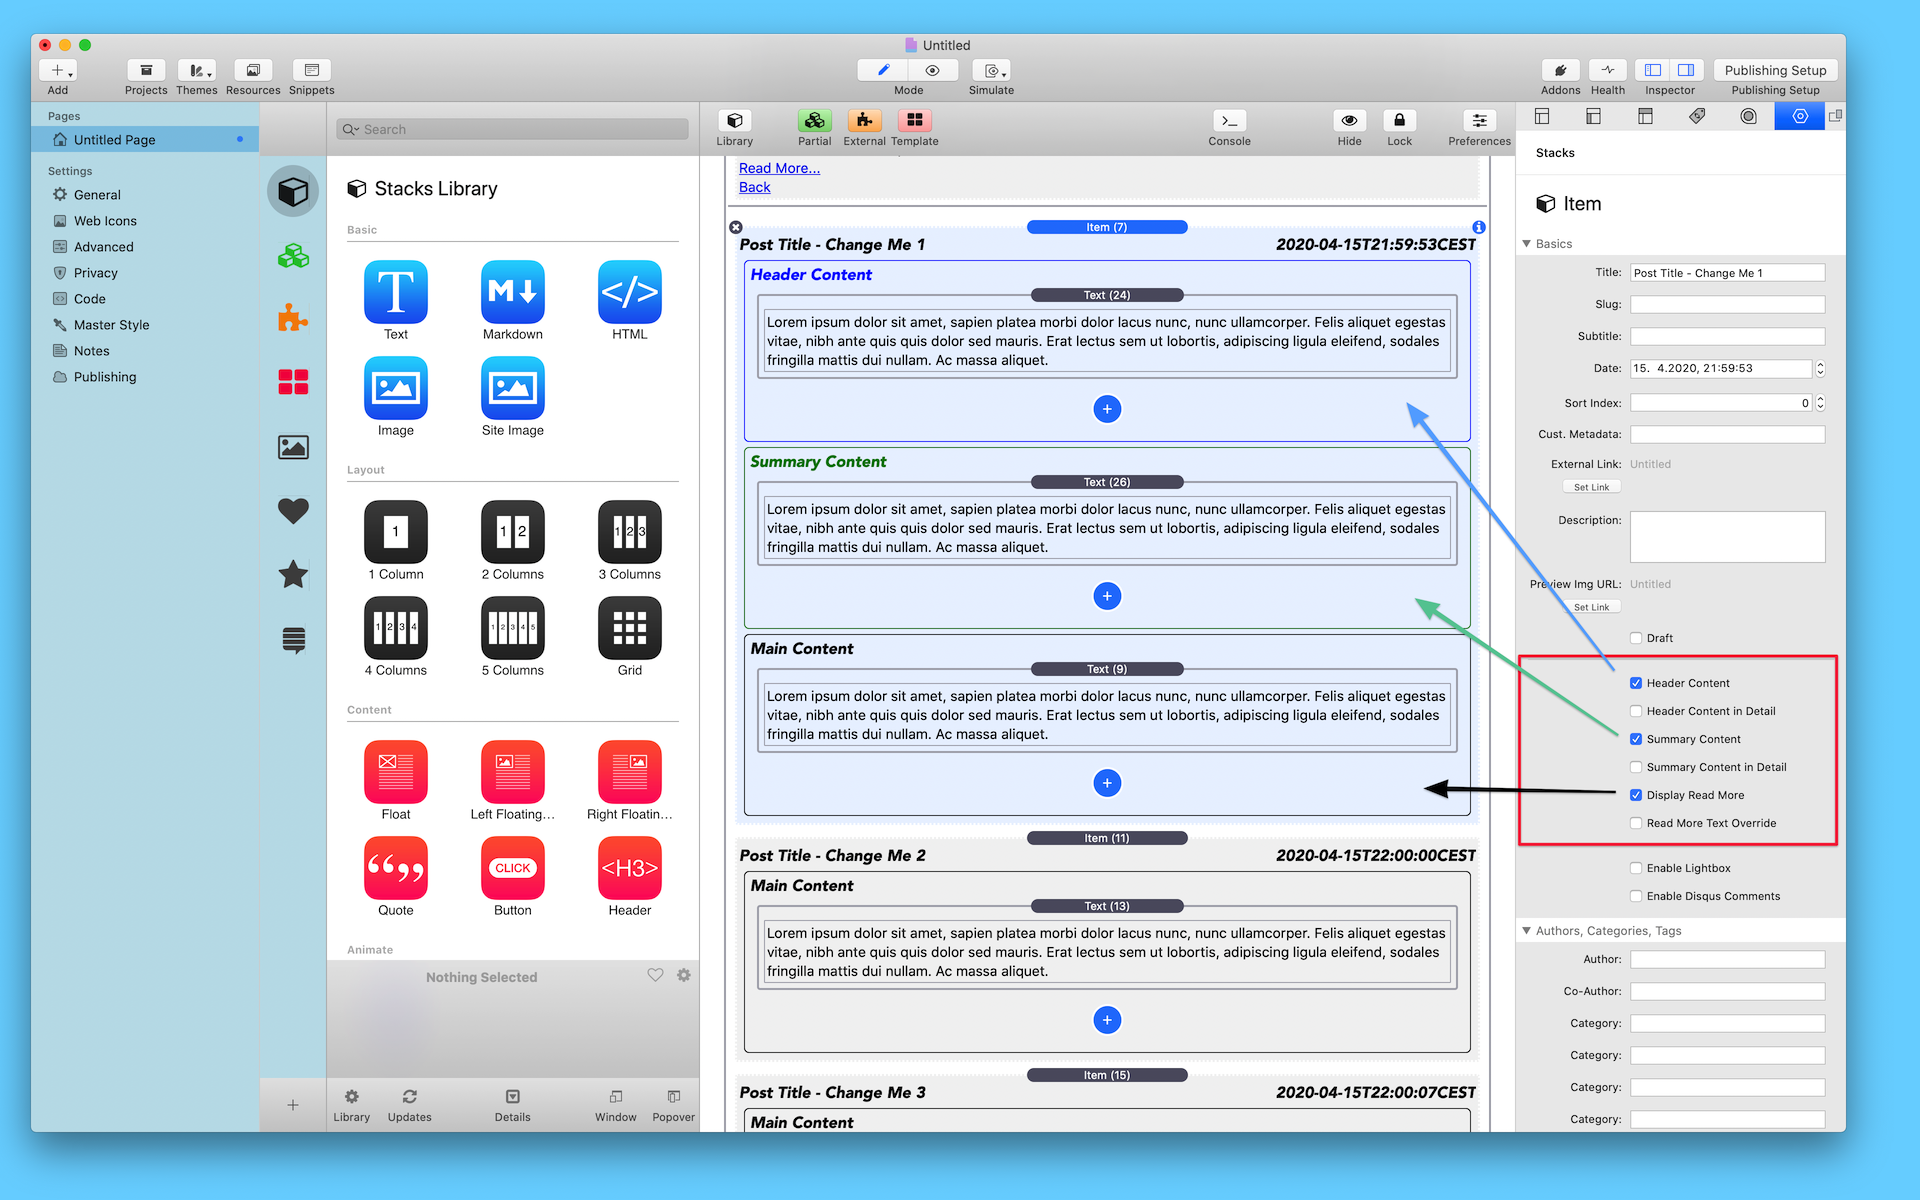
Each Poster Item has 3 content areas, which can be enabled by selecting the corresponding checkboxes:
- Header content. Optional, in most cases an image.
- Summary content. Optional, will be displayed in list view.
- Main content. Will be displayed in detailed view. If no summary content is available, main content will be displayed in list view also.